


Introduction
Google Analytics is an invaluable tool for tracking and analyzing website traffic, but it’s not a one-person job. Often, you’ll need to grant access to other team members, collaborators, or agencies to ensure everyone can benefit from the insights. In this step-by-step guide, we will show you how to give access to your Google Analytics account via the GA dashboard.
The Step-by-Step Guide
Step 1: Verify Your Admin Status
Before you can grant access to your Google Analytics account, you must ensure that you have administrative privileges. This is crucial as only administrators can add new users. Once you’ve confirmed your admin status, proceed to the following steps.

Step 2: Access the Google Analytics Dashboard
Log in to your Google Analytics account using your credentials. After logging in, you’ll find yourself on the main dashboard.
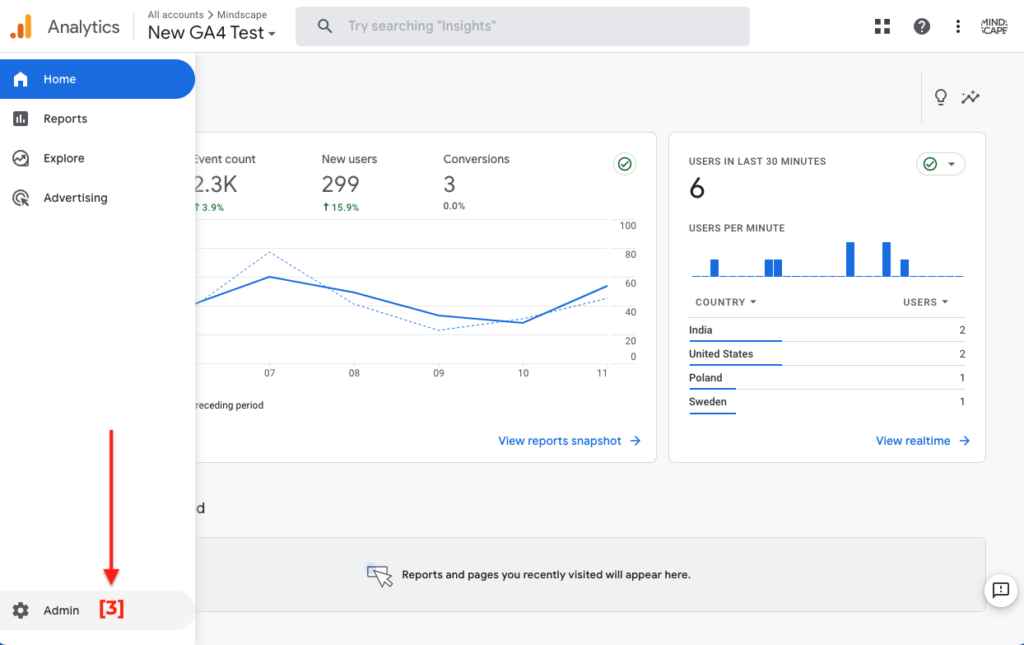
Step 3: Navigate to the Admin Section
In the bottom left-hand corner of the dashboard, you will see an option labeled “Admin.” Click on it to access the administrative settings.
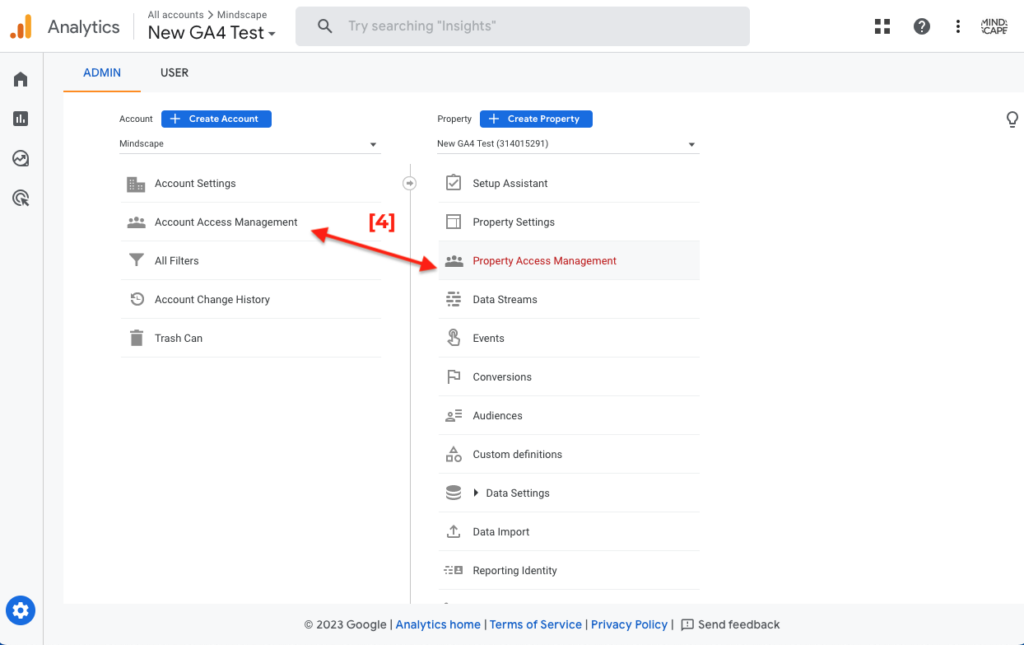
Step 4: Choose Account or Property Access Management
Now, you need to determine whether you want to grant access at the account level or the property level. Account-level access provides control over multiple properties within an account, while property-level access is specific to a single property. Click on either “Account Access Management” or “Property Access Management” depending on your requirements. Generally, you’ll want to grant access to the Property.
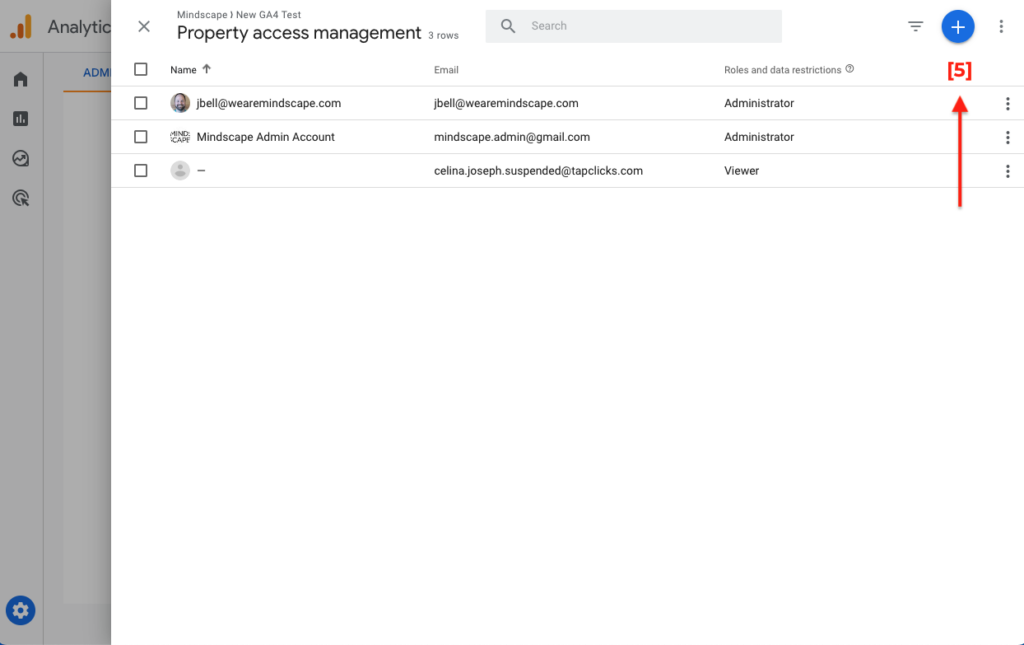
Step 5: Add a New User
For Google Analytics 4, click the blue “+” symbol located in the top right corner of the Access Management screen. This action will allow you to add new users.
Step 6: Enter the User’s Email
In the provided field, enter the email address of the person you want to grant access to. Double-check the email address to ensure accuracy.
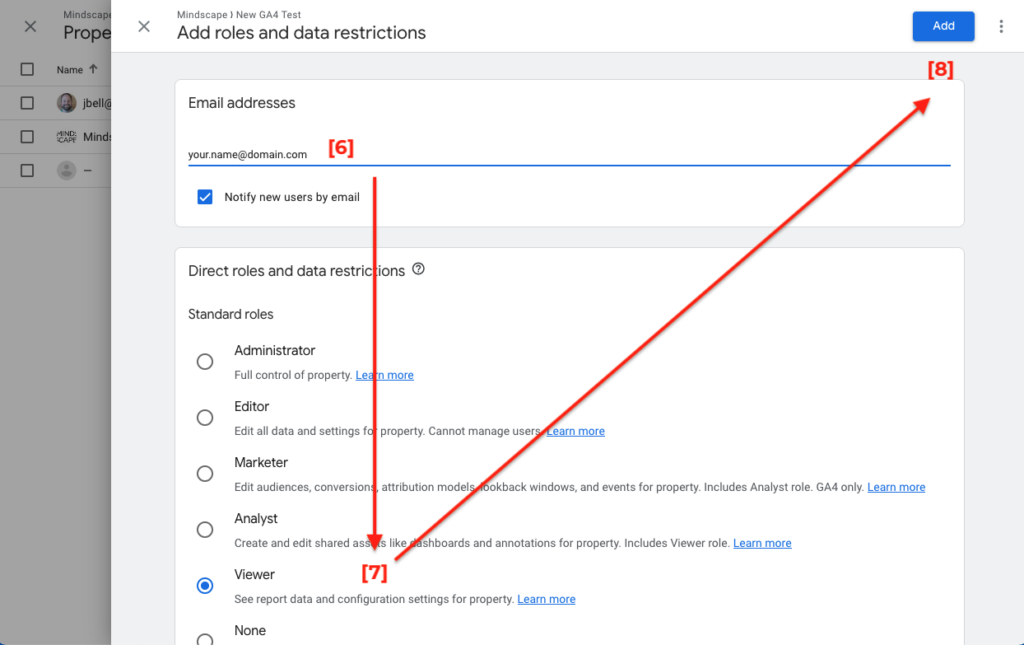
Step 7: Assign Permissions
One of the critical steps is to determine the level of access the new user will have. Google Analytics offers four roles: Analytics administrator, editor, analyst, and viewer.
- Analytics Administrator: This role has full control and can manage all aspects of the account or property.
- Editor: Editors can make changes, but they cannot grant access to others or delete the account.
- Analyst: Analysts can view the data and create reports but cannot make changes or share access.
- Viewer: Viewers have read-only access and can only view the data without making any changes.
Select the appropriate role for the new user based on their responsibilities within the analytics project.
Step 8: Confirm and Add the User
After selecting the user’s role, click “Add” in the top right-hand corner of the screen. This action will initiate the process of granting access.
Step 9: User Confirmation Email
Upon successful addition, the person you’ve granted access to will receive an email notification containing a link. They must click on this link to proceed.

Step 10: Logging In
When they click on the link, the user will be prompted to log in to their Google Account. Once logged in, they should have immediate access to the permissions you granted them.
Summary
Giving access to your Google Analytics account is a straightforward process when you follow these ten simple steps. Whether you’re working with a team, sharing data with clients, or collaborating with an agency, ensuring the right people have access to your analytics is essential for leveraging the full potential of this powerful tool. Now that you know how to grant access, you can confidently manage your Google Analytics account and collaborate effectively to drive data-driven decisions for your website or online business.
Need Help with Your Analytics?
We’ve helped hundreds of organizations tackle everything from setting up their GA4 accounts to creating detailed reporting dashboards. If you need any assistance with your analytics, data management, or reporting, don’t hesitate to get in touch with us.
